Showing posts with label DIY/home projects. Show all posts

Monday, January 28, 2013

Bridal Shower on a Budget-DIY Cupcake Stands

My dear friend Rachel is getting married!! Now, I know every couple is special and love is special and yada yada yada, but let me assure you that their story is more than just boy meets girl. 

Both she and her fiance' have loved our family through some tough times. They are definitely a huge part of our "village" which helps us to raise our children. In fact, I really got to know Rachel when I had surgery last February. 


 I am so honored to be the matron of honor, to have my boys be the ring bearers and to stand along side my friends as they make their vows in March.

The bridal party (minus one who lives out of town).


Instead of registering for wedding gifts, the couple is asking guests to donate to a local tutoring program where they volunteer. It's a GREAT idea, especially for couples who already have everything they need to set up house. The problem is, we wanted to shower the couple with gifts!  


My solution was to have guests bring a "Date Night" gift basket for the couple to enjoy during their first year of marriage. I LOVED seeing all the different date ideas, but was partial to my "Concert date night" idea. Did you know you can buy Ticketmaster gift cards? I love the idea of giving someone an experience, especially for newlyweds. It took our entire church small group to pull it off, but I think they'll have an awesome time at dinner and a concert.


The raspberry punch was adapted from this recipe. I used champagne instead of beer. Delish!!


Now for the budget friendly part:

To make things more classy, I picked up 8 vintage glass dishes and 4 white ones to add to my stash. It was a cheap way to dress up this party and I know I'll use them again! I also used linen napkins which I picked up from the seminary free store. Can you believe, they were new in the package!!


Cup cake stands and other treat stands were made from Dollar Tree glassware.


Between dishes, bowls, candle sticks and wine glasses, you can make any sized elevated platter or candy dish possible! I also picked up about 6 metal trays from the Dollar Tree. It was simple, uniformed, and super easy!


I had a blast decorating for this shower! My house hasn't seen this much pink since our first foster placement last summer! But, the true fun was celebrating two amazing, selfless and giving people who found each other.

---------------

Photos taken by Betty Elaine Photography based here out of St. Louis!! She is an amazing photographer with a unique point of view. Not to mention, she's a sweet stylish gal! Check out her blog, too!!

Sunday, January 6, 2013

DIY Non Slip Magnetic Travel Trays

The boys and I travel. A lot. We rarely go anywhere closer than 4 hours away. We don't have a portable DVD player or hand held games so we make due with good old fashioned paper books and art supplies. For a while, I've been on the hunt for some sort of lap tray for the boys, but they are all too expensive (remember, I'm buying 2!). While at the $1 store the other day, I realized I could make a couple of my own, and they'd be magnetic!

All you need is scissors, hot glue, 1 roll of shelving mat and a small cookie sheet.

Cut a piece of the shelving mat to fit the bottom of your tray.


Glue the mat to the bottom of the tray.


All done!!! Now you've got one shiny new magnetic travel tray that is also non slip so it sticks to your child's lap!


We tested these out during our 5 hour drive to Nashville for Christmas (and home!). They worked great!!


These were the perfect thing for our 5 hour trip to Nashville. I usually keep car toys and activities stowed away during our visit. That way, as we load back in the van 7 days later, everything feels fresh, new and fun again. The trays were no different!

Tuesday, December 11, 2012

Holiday Wreath Making Party

We're in the middle of December, which means many of you are attending and/or planning some sort of holiday party. I LOVE a reason to dress up and decorate, so you can imagine how much I love the month of December!

This year, after a wreath making night at a local church, I had enough left over supplies to host one of my own. Nine ladies gathered around my dining room to drink hot cocoa, listen to Christmas music and decorate straw wreath forms.


I loved seeing the different wreaths my girl friends made, but I mostly enjoyed their company. Since I had already made my wreath, I decided to create a star for our Christmas tree. I love how it turned out and think it fits our style nicely.

What parties have you attended this season? Any ugly sweater parties?? I haven't been to one of those in almost 10 years! Maybe I should throw one myself.

Monday, November 5, 2012

DIY Ribbon Wreath Project

In a few weeks, I will be hosting a craft night for a women's ministry at a local church. We decided to make wreaths and I've spent the last few weeks collecting supplies.

I really liked the straw wreaths as they seemed more substantial than the foam ones. For bulk orders over $100, try this craft website. They also carry various birds for very cheap! Also, Walmart has them for $2.75 each, which I found out after ordering 45 of them!! Oh well, you craft and you learn, right?

I began by wrapping my wreath, being careful to keep one side nice and smooth. Because the ribbon is 2.5 inches thick, it did bunch a bit. I just made sure it was bunchy on the side facing the wall. I used about 3 sticks of hot glue for this project. Half of that was just for securing the ribbon.
{Isn't this silver feather ribbon awesome?}

I left about two inches of my wreath unwrapped. This way, I could stick berries and branches into the ribbon and secure it with glue. Once it was all in place, I wrapped a bit of red velvet ribbon to finish it off. This also gave me another smooth surface to glue bows and a bird onto.


I added a few birds, beads and berries and voila! The finished product:


I probably could have put more greenery on it. My wreath is 18 inches so it has plenty of room for decorative birds. Maybe I'll add to it throughout the week. I just love the color scheme though!

I know Halloween was just last week, and I fully intend on celebrating Thanksgiving wholeheartedly. I also don't see any harm in preparing for Christmas :)

Sunday, December 4, 2011

Let It Snow

Last week, the boys and I made our Mason jar snow globes. They turned out sooooo cute!! I took a few pictures thinking I would create a tutorial for y'all, but things have been crazy around here! Then, this week, one of the blogs I follow posted this great tutorial for home made snow globes, so definitely check it out.

The project takes no time at all. Actually, the two best and most time consuming parts are picking out an ornament (with a flat bottom of course) and pouring WAY too much glitter into the jar.


Saturday, November 19, 2011

DIY projects with little ones

I hate to talk about the weather, but it's been very strange around here lately. Last week we had a few days that were so windy and cold, I didn't even want to walk from my house to the car, especially with the kids. On days like those, I get a lot of laundry done and work on little DIY projects. Here's what we've been up to:

Elijah helped me mix our new homemade laundry detergent.

We made the powder version which is incredibly cheap and easy. A few tips for anyone interested in doing this yourselves:
  1. Only use the powder version with top loading washers. The soap needs to dissolve before adding your clothes so they don't come out with clumps on them.
  2. Start the load with hot water and the soap will dissolve much easier. Swish the water and soap around with your hand and then quickly switch the setting to cold or warm water depending on the colors you are washing.
  3. I used 3 bars of Ivory soap. Works great!
*making my own laundry detergent makes it possible for me to use the very best soap for my cloth diapers. even though i pay an arm and a leg for my Rockin' Green Detergent, i am still saving money. unbelievable!

Elijah and I made a shark costume. It is not my proudest work, but we whipped it up in 15 minutes and Eli had plenty of time after dinner to "eat" everyone for dessert. Elijah painted the mask blue and then I quickly sewed a fleece hat complete with a fin (can't quite see it in the photos).

Now, back to the weather. When it's not 40 degrees and blustery, it's 75 and sunny. On days like those, we want nothing more than to play in our back yard.

{he tries so hard, but wearing his big brother's snow boots naturally makes things more difficult}


He eventually made it.


Show off!

I've been thankful for these last few days of warmth. It would be nice to wear my leggings and boots in the middle of November, but I've been in the Midwest long enough to know that winter is a-coming. It's just around the corner and I WILL NOT complain about 75 degrees!

Last night was another chilly windy night. The boys and I met friends down town for some holiday festivities. We missed the actual tree lighting but had fun in the decorated City Garden, watching the fireworks.

Wednesday, April 20, 2011

Entry Way Envy

I recently stumbled across Lucky By Design, a Canadian blog about art, food and DIY projects. I was so incredibly inspired by this entry way shoe wall.


This definitely works for a chic's nest, but would Dan's beat up tennis shoes look that cute hanging from a Paris poster? If only he wore bright yellow pumps....

Thursday, August 12, 2010

New rocking chair!

The last two weeks have been filled with working on half finished projects. Many of them may not be finished in time due to outside circumstances, but the rocking chair was high on the priority list, and so I made it happen. I cannot wait to sit on this adorable gray rocker, nursing little Laz between his bed and Eli's in the middle of the night. I had so much fun finishing this chair knowing the memories it would bring.

Before, it was a cute little cushion-less red rocker in need of some TLC.


Now, it's a more neutral gray with a geometric off center patterned cushion. The fabric is from Ikea. I have to say, I was disappointed to see that it was such a large pattern. I thought the flower would be much smaller. Still, I am happy with how it turned out. It's good to have something a little more random for the symmetrical control freak that I am. (and yes, that is wallpaper in the background-my dearest friend Jessica sent it to me after reading THIS post. Dan and I hope to have it done before Laz comes.)

Sunday, August 1, 2010

De-clutter!

I'm in serious nesting phase right now. There are so many little things to be done: finish the rocking chair project, make Lazarus a mobile, finish a painting for our dining room, wash and prepare home birth linens, and generally keep up with laundry and dishes (just in case). In the midst of all that, I find myself de-cluttering the house as well. I've got a small box of things to take to the free store at our church.

I do not like clutter. I like clean surfaces with everything in it's place. I find myself spending at least 15 minutes a day putting objects and papers back where they belong. If an object is broken or serves no purpose, it goes out. This is especially true for my bedroom. Clothes, toys, and books are all put away throughout the day because I literally cannot sleep in a messy room. It needs to be serene.

I don't know why I am this way, but organization comes naturally to me. It's almost a hobby. However, I have friends and family members who really struggle to keep away the clutter. Lately, I've been enjoying these short articles through the Real Simple blog, and thought I would share a few with you.


If you find yourself to be the clutter kind of person, these articles might give you some helpful tips. If nothing else, they will at least give you something to think about when it comes to keeping your home 'clean'. For anyone who is interested in reading more about organization, check out Unclutterer.

Saturday, July 24, 2010

New vanity & Entryway seat

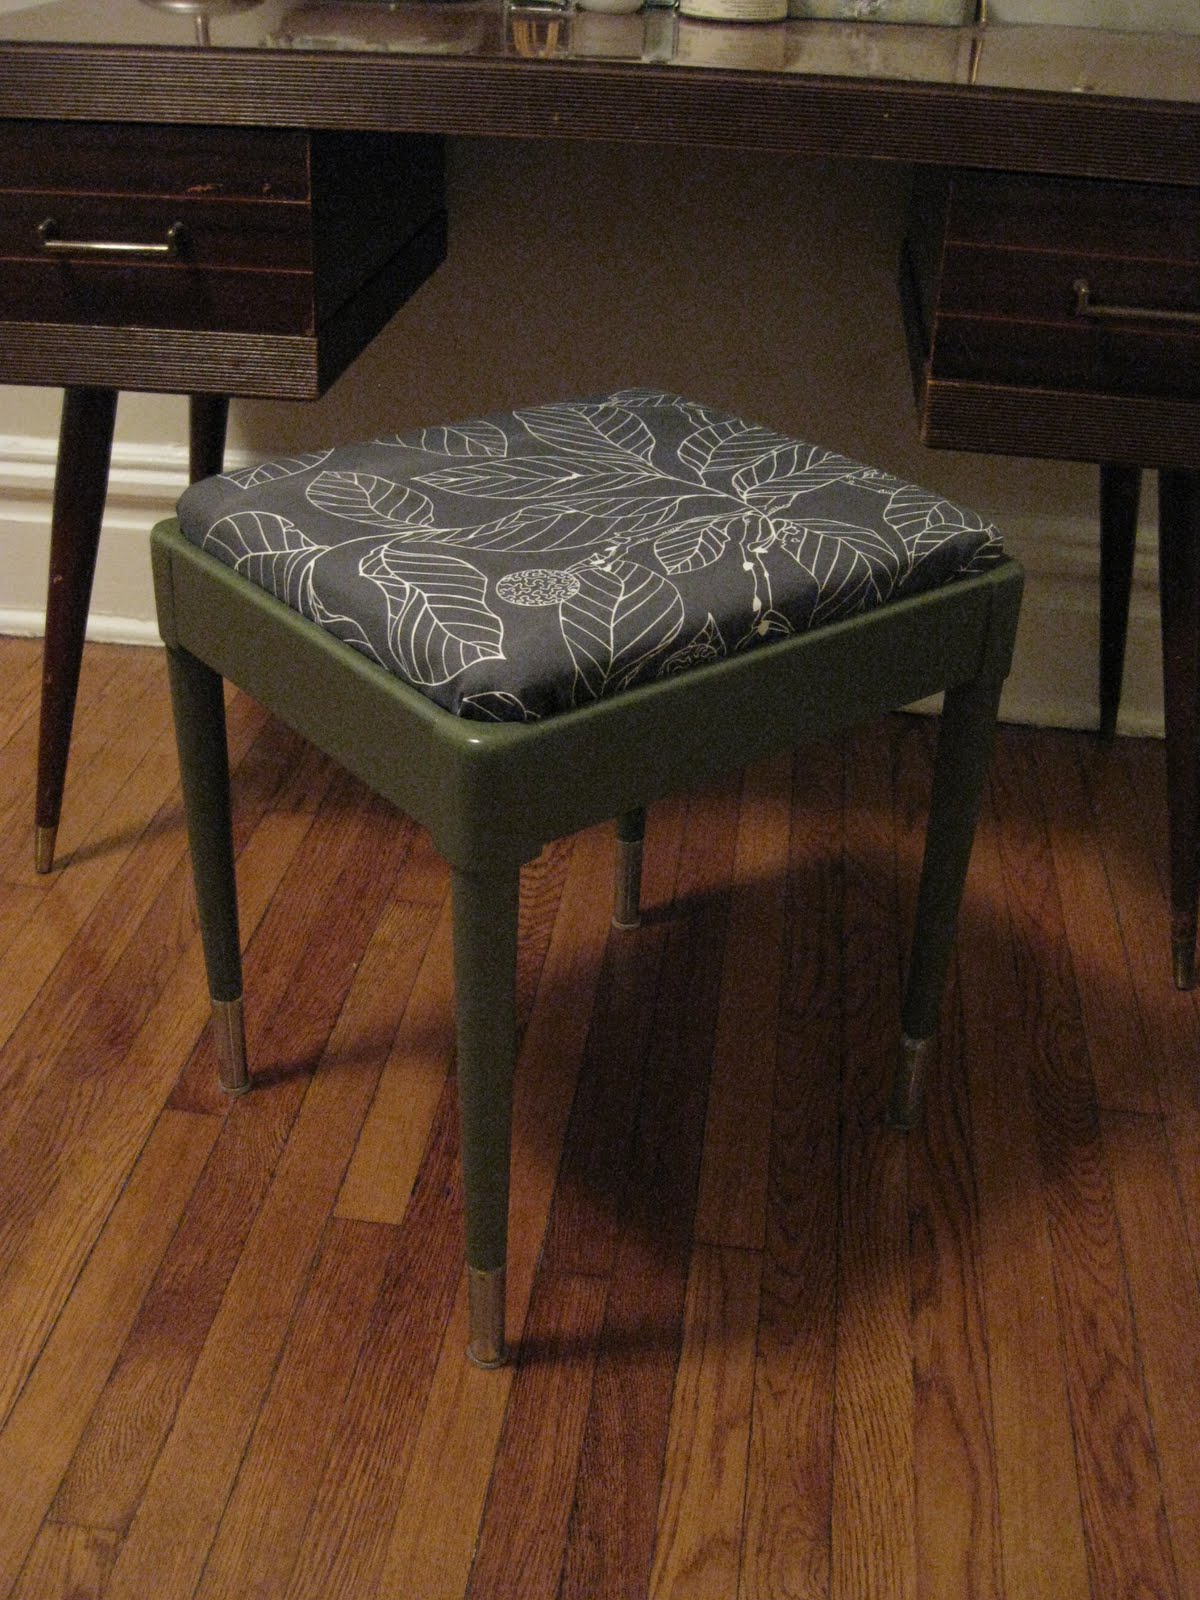
My dad came to visit us a few months ago and with him, he brought a beautiful little desk. He got it for $10 at Goodwill! When he first mentioned it to me, I told him we had no room for another desk. Immediately following the picture text he sent me, I told him that "I need it!!!". It was true, we had no room for another desk, but this was small enough to fit in our bedroom and be used as a vanity.


Our bathroom is tiny with very little storage. It was always in the plan to have some sort of vanity/dressing table in our room, but I never came across the right thing. This little tapered leg beauty was light enough while also giving balance to the room. The vanity also inspired me to do a project that had been on my list since we moved to St. Louis. Last summer, I picked up a cute little sewing stool (again at Goodwill) for a few dollars. I knew I wanted to paint it and recover the seat, but I wasn't sure about how I would be using the stool. It turned out to be the perfect thing to rest on while doing my hair/make up. It was originally white (only primed) with an old thin piece of red fabric covering the seat. I spray painted it olive green and covered the seat with my favorite durable gray Ikea fabric. I really like how it turned out. It looks great with all the other greens in our room and I like how the fabric connects it with the rest of the house (dining room chairs and entryway seat).


Speaking of entryways, welcome to our home. And yes, our stairs and handrail are painted red!


I just realized that I never shared the "after" pictures of my adorable little telephone seat I picked up last October. This might be one of my favorite pieces of furniture in our house. I sit here almost every day with Eli while we put on our shoes and sort the mail.